Design
How custom neon signs are made, from idea to wall
The steps behind a custom neon sign: your idea, the free proof, tube paths, routing the acrylic, fitting LED tube or bending glass, checking and packing.
Updated
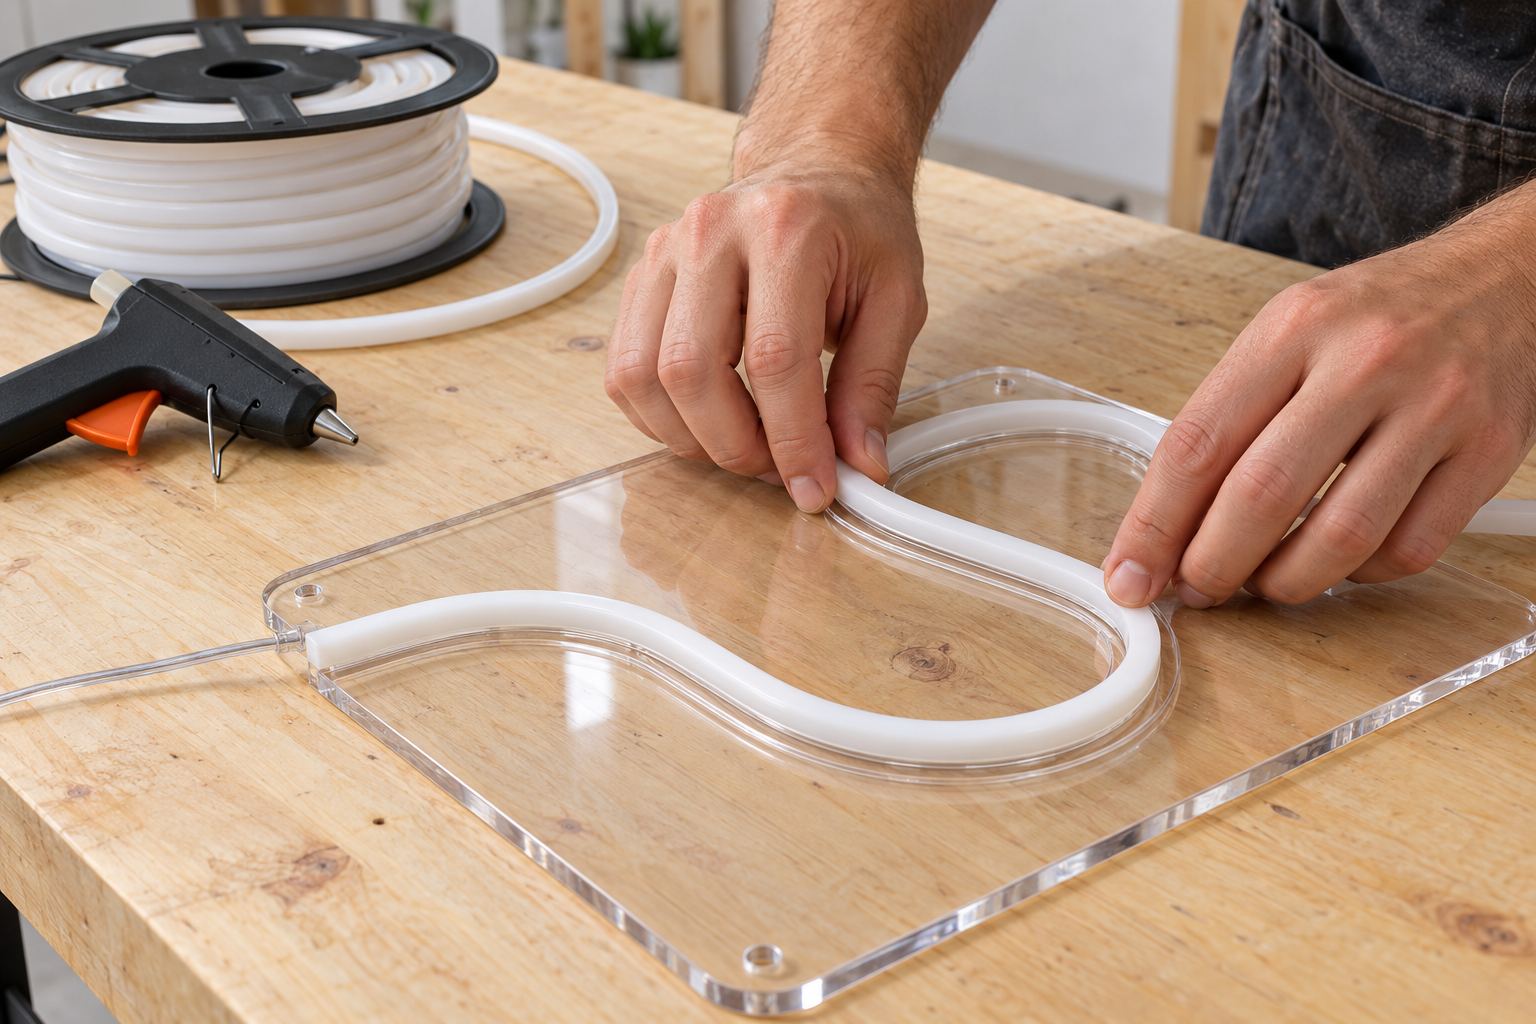
A custom neon sign goes through more hands and steps than most people expect. Knowing the steps helps you plan your date, check the right things on your proof, and understand why some details look the way they do. Here is the path from your idea to your wall, first for LED neon and then for real glass neon.
The short version
- You send your words, logo or idea.
- We draw a free proof.
- You approve it, or ask for changes as many times as you need.
- We draw the tube paths and the backboard.
- The acrylic is routed and cut.
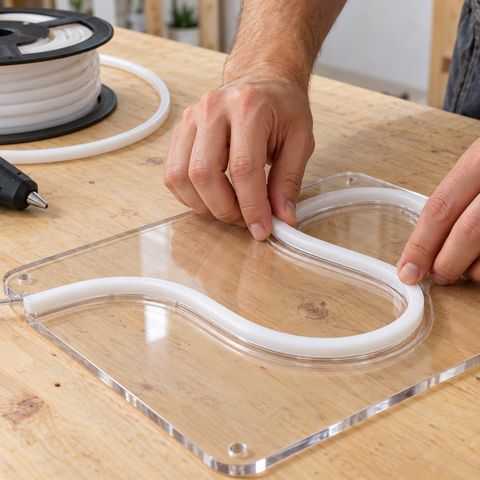
- The LED tube is fitted into its groove.
- The tube is wired to the 12 V input and the dimmer.
- It is packed with everything you need to hang it and shipped.
1. You send your idea
For text, the quickest start is the neon designer: type up to 3 lines, choose a font, a color for each line if you like, a width from 20 to 120 in, the backboard, how you want to mount it, the dimmer and the power. For a logo, start on the custom logo neon sign page. Vector files work best, but a photo or a sketch is enough to begin. If you did not send the file at checkout, we email you to collect it.
2. We draw a free proof
The proof is a mockup of your sign with its size, colors, font and backboard shape. It is free, and you can ask for as many revisions as you need. Our guide to the design proof process explains what to check on it.
3. You approve, and the clock starts
Nothing is made until you approve the proof. Standard production of 15 to 20 days counts from the day you approve, so a quick reply moves your sign into production sooner.
4. Drawing the tube paths
Before anything is cut, your design is turned into the exact lines the tube will follow. A few rules shape this step:
- Thin lettering gets one tube along the centre line of each stroke.
- Bold letters and solid shapes are outlined.
- Sharp corners are rounded to about 3/4 in (20 mm), and tube ends are round, because a tube cannot bend to a sharp point.
- Details too small for tube, like tiny text or fine lines, are marked for UV printing on the board.
- The backboard shape is drawn clean: a circle for a round logo, a rounded rectangle for text, small corner radii, and no wavy outlines held by thin bridges.
- Mounting holes, 1/4 in across, are placed near the corners or the ends of strokes.
If you want to know more about why letters are drawn this way, see what LED neon is.
5. Routing and cutting the acrylic
The standard backboard is clear acrylic, 6 mm (about 1/4 in) thick. A groove is routed along every tube path, the outline is cut to the shape on your proof, and the mounting holes are drilled. Any details marked for print are UV printed onto the board, or for a printed backboard sign the whole artwork is printed in full color. If a venue or fire inspector requires it, a flame-retardant polycarbonate board replaces the acrylic. Our backboard options guide covers the shapes and finishes.
6. Fitting the tube
The LED strip goes into the bottom of the groove, the flexible silicone tube is pressed in on top, and it is sealed with glue. For an outdoor sign, the tube is IP67 rated and the connections are sealed; the outdoor build comes with a test report.
7. Wiring
The tube sections are connected to the 12 V input, along with the dimmer you chose, or the controller and touch remote for a color-changing sign.
8. Packing and shipping
The sign is packed with its plug-in adapter, the dimmer, and the mounting kit for your installation: wall standoffs, ceiling hanging cables, no-drill adhesive mounts or a clear free-standing base. If you chose the battery option, the 8 x AA battery box is in there too. Transit in the US takes 3 to 5 days. When it arrives, our guide to how to hang a neon sign takes you through the install.
How real glass neon is made
Real glass neon follows the same first steps, a free proof and your approval, and then a very different process.
- A full-size pattern of the design is laid out to bend to.
- The glass is bent by hand. The tube, 6, 8 or 10 mm across (12 mm on request), is softened over a flame and bent to the pattern, one curve at a time. The bender blows gently through a hose while working so the softened glass keeps its round shape.
- Electrodes are fused on at each end of every tube.
- The tube is cleaned with heat and emptied of air. In a step called bombarding, the tube is heated to drive out impurities, which are pumped out with the air.
- The gas goes in. The tube is filled at low pressure with neon, which glows red-orange, or argon, which is used for blue and many coated colors.
- The tube is burned in on a transformer before it goes on the sign.
- Jumps are painted black. Where the tube travels from one letter to the next, the glass is painted black so only the letters glow.
- It is mounted and wired to its high-voltage transformer, on a clear backboard, a metal frame, or no backboard, or inside a black steel box.
Very fine detail and thin strokes have limits in glass, and our designer will tell you before production if part of a design must be simplified. Glass neon takes about 4 weeks to make.
Timeline at a glance
| Step | LED neon | Real glass neon |
|---|---|---|
| Proof | Free, unlimited revisions | Free |
| Production | 15 to 20 days after approval | About 4 weeks |
| Faster option | Priority 10 to 14 days, Express 7 to 9 days | Ask before ordering rush |
| US transit | 3 to 5 days | Ask us when you order |
How to keep your sign on schedule
- Send a clear file and your exact wording at the start.
- Reply to your proof quickly, and read every word before you approve.
- If you have a fixed date, order early, or add rush production for an LED sign. If a date cannot be met, we say so before production starts.